 Save Pin
 My roommate came home one rainy Tuesday absolutely drained from a terrible day at work, and I had maybe thirty minutes to turn things around. A pot of chili felt like the right move, the kind of dish that fills your kitchen with warmth while you're chopping and stirring. What started as throwing together what we had became this bowl that somehow made everything feel manageable again. That's when I realized chili isn't really about the recipe—it's about creating a moment where someone can sit down, take a breath, and feel genuinely cared for.
I made this for a small dinner party where someone brought their new partner, and I was nervous about impressing them with minimal fuss. The moment everyone was dipping spoons in and customizing their bowls with different toppings, I watched the table transform from polite conversation into genuine laughter and connection. That's when I understood—this recipe works because it invites people to make it their own.
Ingredients
- Olive oil: Use something you'd actually taste on bread, because it's building your flavor foundation from the first sizzle.
- Onion and garlic: These two are doing most of the heavy lifting in the background, so don't skip them or rush them—let them actually soften and start caramelizing at the edges.
- Bell peppers (red and green): The color matters as much as the sweetness they bring, creating that visual brightness even before you taste it.
- Ground beef: I've used turkey and plant-based options with great results, but whatever you choose, break it up really small so it disperses throughout the chili instead of sitting in chunks.
- Tomato paste: One tablespoon might seem small, but it's worth a full minute of cooking to deepen and concentrate all that umami.
- Canned tomatoes: Don't drain them—that liquid becomes part of your sauce and keeps everything rich and cohesive.
- Kidney beans and black beans: Drain and rinse them well to remove that starchy liquid that can make the chili feel slimy; this one small step makes a real difference.
- Corn kernels: Fresh is lovely in summer, but frozen works just as well and honestly tastes fresher than you'd expect.
- Spice blend (chili powder, cumin, paprika, oregano): These work together like a conversation, each one adding its own voice without overpowering the others.
- Cayenne pepper: Optional, but it's your chance to add personality—use it if you want heat that builds gradually rather than hits all at once.
- Beef or vegetable broth: This is your insurance policy against the chili getting too thick; start with a cup and you can always add more if it needs thinning.
- Rice or grains: Brown rice is reliable, but quinoa adds an interesting nuttiness and farro brings a chewy texture that's unexpectedly satisfying.
Tired of Takeout? 🥡
Get 10 meals you can make faster than delivery arrives. Seriously.
One email. No spam. Unsubscribe anytime.
Instructions
- Heat and soften your foundation:
- Warm the olive oil in a large pot over medium heat, then add the diced onion. You're listening for a gentle sizzle, not a violent sear—give it two to three minutes until the edges turn translucent and the kitchen starts smelling like something wonderful is happening.
- Build the aromatics:
- Add the minced garlic and both bell peppers, cooking for another three to four minutes. This is when you'll notice the vegetables softening and releasing their sweetness, which becomes the gentle base layer under everything else.
- Brown your protein:
- Crumble in the ground beef and cook, stirring occasionally with a wooden spoon, until it's browned and no longer pink—about five to seven minutes. The meat should break into small pieces that distribute evenly rather than staying in clumps.
- Deepen the flavor:
- Add the tomato paste and let it toast:
- Stir it in and let it cook undisturbed for a full minute. This concentration step might seem subtle, but it transforms the paste from tasting canned to tasting rich and purposeful.
- Build your chili:
- Add the diced tomatoes with their liquid, both drained beans, corn, all your spices, salt, pepper, and cayenne if you're using it. Stir everything together until the color becomes this deep, inviting red-brown, then pour in the broth and give it another good stir.
- Let it simmer:
- Bring the pot to a gentle simmer, then lower the heat to low and cover it. Let it bubble quietly for twenty-five to thirty minutes, stirring every so often to make sure nothing sticks to the bottom. The flavors will gradually knit together as the spices bloom and the beans soften further.
- Prepare your grains:
- While the chili is simmering, cook your rice or grains according to package directions so they're ready when you are.
- Serve and celebrate:
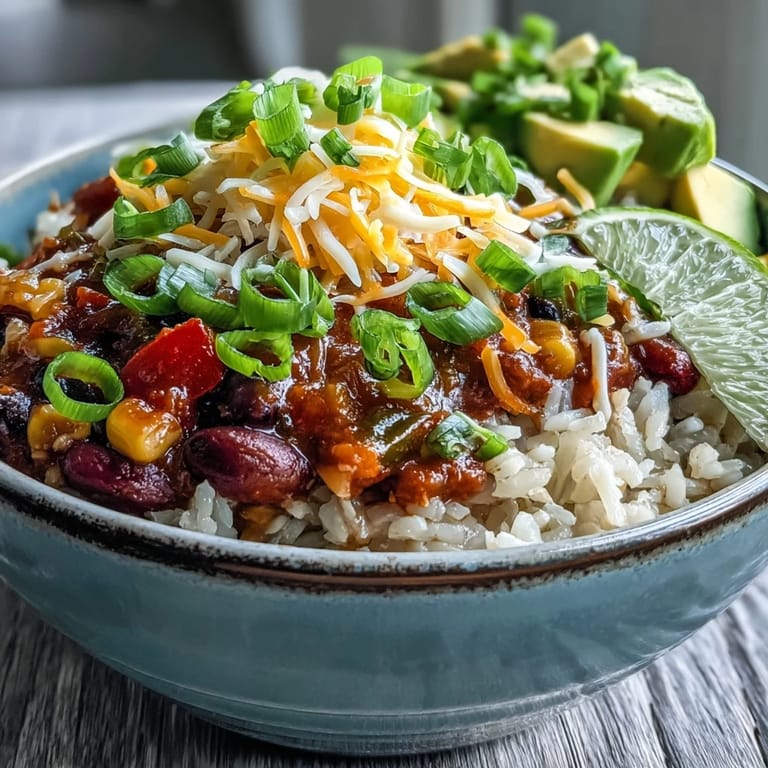
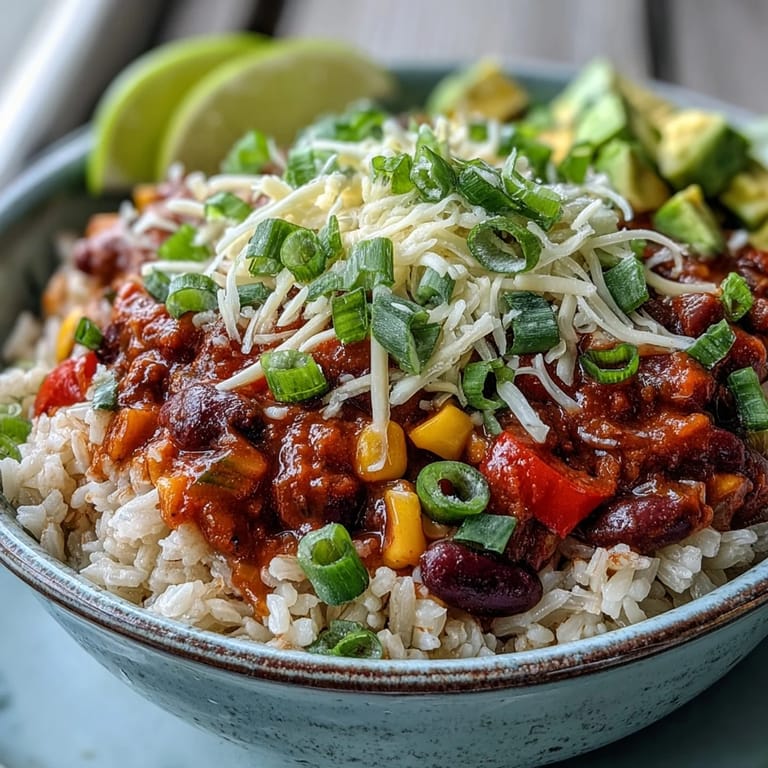
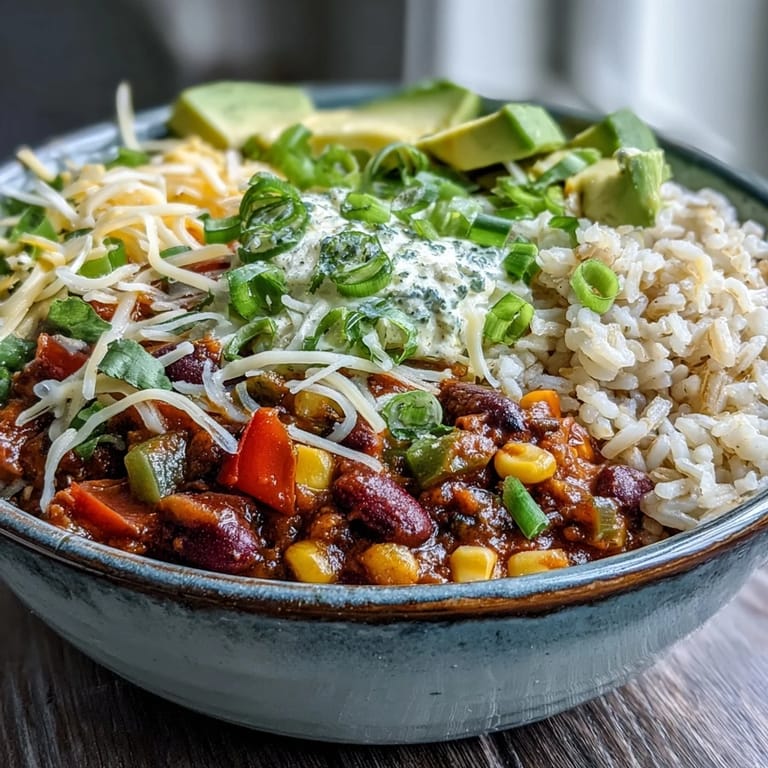
- Spoon your cooked grains into bowls, then ladle the chili over the top generously. Set out all your toppings and let people build their own version of the perfect bowl.
 Save Pin
 My neighbor texted me once asking for this recipe because her kid had become a picky eater, and she wanted something where he could choose his own adventure with toppings. A month later she told me he'd started helping her cook it, and now it's their Wednesday night tradition. It's strange how a pot of chili became the thing they do together when he needs to talk about his day.
Making It Your Own
The beauty of this chili is that it's genuinely flexible without losing its soul. I've made it with ground turkey when I wanted something lighter, with extra beans and no meat for vegetarian friends, and once with a full can of black olives because I had them sitting around. The spice ratio is a starting point, not a law—some nights I want more heat, other nights I want the sweetness of the corn and peppers to shine through. What matters is that you're tasting as you go and adjusting to what feels right in your kitchen that day.
Toppings Are Everything
I used to serve this chili plain because I thought the recipe was complete, but then I realized the toppings aren't garnish—they're the final voice in the dish. A squeeze of lime bridges all the flavors together, a handful of cilantro adds a brightness you didn't know was missing, and cheese creates these little pockets of richness that change every spoonful. Watching people customize their bowls turned this from something I made for them into something they made for themselves.
Storage and Leftovers
This chili improves as it sits because the spices keep deepening and the flavors marry together overnight. I always make extra because I genuinely prefer it the next day, reheated gently on the stovetop with a splash of broth if it's gotten too thick. It freezes beautifully for up to three months, and honestly having a container of homemade chili in the freezer feels like giving yourself kindness from the past.
- Store it in an airtight container in the refrigerator for up to four days.
- Freeze in portions so you can defrost exactly what you need without waste.
- Reheat slowly over low heat, stirring often, and add a little broth if it's thickened too much during storage.
 Save Pin
 Every time I make this chili, it tastes like showing up for someone—whether that's myself on a rough evening or a friend who needs more than just dinner. That's the recipe that actually matters.
Cooking Questions & Answers
- → Can I make this chili vegetarian?
Yes, simply substitute plant-based ground meat or add extra beans for protein. The spices and vegetables create plenty of flavor without meat.
- → How spicy is this chili?
The base has mild to medium heat. Adjust spice level by adding more or less cayenne and chili powder to suit your taste preferences.
- → What grains work best as a base?
White or brown rice are classic choices. Quinoa, farro, bulgur, or barley also provide delicious texture and absorb the flavorful sauce beautifully.
- → Can I make this ahead of time?
Absolutely. Chili actually tastes better the next day as flavors meld. Store in the refrigerator for up to 4 days or freeze for up to 3 months.
- → What are the best toppings?
Shredded cheddar, sour cream, sliced green onions, chopped cilantro, diced avocado, jalapeño slices, and lime wedges all add complementary flavors and textures.
- → How do I adjust the consistency?
Add more broth for a thinner chili or simmer uncovered longer to thicken. The mixture naturally thickens as it sits due to the beans and tomatoes.